Wednesday, December 11, 2013

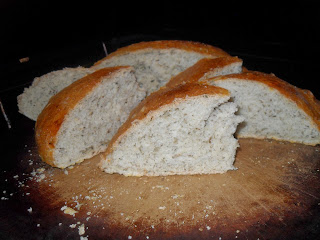
Bread-Rosemary


So, this is a new bread recipe for my family here on the farm and I am amazed at how quickly the pieces disappear! I could make a loaf every day and my two teenage boys and husband would see to it that there were no crumbs left. Feeding Frenzy! 

Enjoy!


Rosemary Bread

Ingredients:

1 cup warm water
1 T sugar
2 tsp yeast
1 tsp salt
2 T fresh rosemary or 2 tsp dry rosemary
1 tsp Italian seasoning
1 tsp pepper
2 T olive oil
1 1/2 cup bread flour plus 1/2+cup for kneading

***1 egg whisked and 1 T water for egg wash***

In a big bowl put water, sugar and yeast. Allow to sit for 10 minutes

Add salt, rosemary, seasonings, olive oil and flour until ingredients form a ball

Knead on a floured surface for about 5 minutes. Add more flour as the dough becomes sticky

Knead until smooth

Put dough in a covered, greased bowl until it doubles in size (about an hour)

Punch dough down and form into a round loaf. Place on a nonstick surface (I used non stick aluminum foil) and let it rise double again (about 45 minutes)

Preheat pizza stone in 400 degree oven

Place dough on preheated stone after it has risen for a second time.

Top with egg wash

400 degree oven for 20-25 minutes until top is golden


Tuesday, December 10, 2013

3 Hobbies- Do You Have 3?


The new secret to happiness is (drum roll please)...

                ...having 3 hobbies that don't have anything to do with screen time and that aren't connected to your occupations. Happiness=No Screen time? Not a difficult concept to wrap my head around.  Time for some soul searching and deciding what are those 3 hobbies I possess  to find complete and total happiness in my somewhat chaotic life. I think I do have 3.

1. Soap Making
2. Gardening
3. Prepping


Soap making is going to (hopefully) turn into a profession but at this time it is just a hobby. The time and money involved to go from hobby to full production is a little frightening for me at this time. Making soap fills my creative need. The variations of styles, textures, scents and colors are endless. Plus, the final product outcome makes you clean!


Gardening fills my connection to the earth and its many cycles. I am in no way a drugged out hippie. It is just a passion of mine to continue to make improvements and changes on my little farm and take it as far as I can. If you aren't inspired by a tiny little seed who grows up and nourishes your body, then you definitely have to unplug!


Prepping allows me to plan ahead and create security for myself and my family in scenarios big and little. It takes the stress and worry out of any impending dangers. I know Jesus taught of the birds relying on their faith to provide for them but I am pretty sure He would be proud of the Preppers of the world. I would like to think that if birds were able, they would prep-squirrels do!


So what do you think? Do you want to be happy and have a more amazing life? Take inventory and decide what kinds of interests YOU have. Go ahead...I'll wait!

Monday, December 9, 2013

Apple Crisp- Hidden Acres Style
I'm not a big dessert freak...but my family sure does have some favorites. I made an easy apple crisp this weekend and had most of the ingredients on hand. A stocked pantry is a good sign as we head into some leaner financial months!

Hope you enjoy it~


Ingredients

4 apples
3/4 cup brown sugar
1/2 cup flour
1/2 cup oats
1/3 cup butter-softened
1 tsp cinnamon
1 tsp nutmeg

375 degrees

Grease bottom and sides of 8 inch square pan

Layer apples in the bottom  of the pan

Mix remaining ingredients together and spoon over apples

Bake for 30 minutes until the topping is a lovely brown

Serve with some ice cream or whipped cream or whatever you fancy!


Sunday, December 8, 2013

Tis The Season-Dehydrating Turkey


We always stock up on turkeys this time of year. At $7.00 a bird it would be silly not to. We ended up having our regular Thanksgiving feast and then the next day another turkey went into the oven. It seemed like a good idea at the time but as we started eating through the second bird, my family began to show some signs of~ "Enough already"(kindly of course). Oh, dear. Whatever were we to do with all of these scrumptious leftover white and dark pieces of heaven? 
Making jerky was our first thought but reading about how turkey can come out somewhat more brittle than beef, we decided to dehy it. Oh what fun!
This works well with chicken and turkey, but you will not want to use goose or duck or any other bird that has a lot of fat or prepares as greasy. Fully cook the turkey. Allow it to cool and remove skin and any extra fat. 
The recipe said to cut the turkey into cubes measuring 1/2 an inch. That did not work out for me at all. I cubed what I could, but there was also a lot of shredded and extra falling pieces that ended up on the tray. 

Layer turkey meat in a single layer on lined dehydrator trays. Set temperature at 155 degrees for 4 hours and then lower to 130 degrees for the rest of the drying time. The pieces should be hard and dehydrated all the way through.
 (***Remember, I can not direct you as to the full length of dehydrating. It all depends on your machine and your situation.)

To use your dehydrated turkey pieces: add 1 cup of boiling water to 1 cup of turkey. 
Use in soups, stews, and anywhere else you would use turkey!

Good luck and keep dehydrating!!!

Wednesday, November 27, 2013

Very Thankful

And another Thanksgiving approaches. I certainly have been counting my blessings as of late. As cliche' as it all sounds-Life really is too short.

17 days ago an intervention from God's hands to my heart  struck like a bolt of lightning. For as amazing as my life is and all the blessings I have received- I was sick. Sick in my body, mind and soul. The sickness (driven by anger and hatred) was driving me deeper and deeper into hell.

As my husband and I sat at our table that night 17 days ago, we both were struck with an overwhelming ENOUGH! Like hitting a brick wall-enough. Our eating habits, our drinking habits and every single one of our other habits had us driving straight off a cliff. Thelma and Louise was my past life and I knew at that moment, things had to change. Dramatically change.

So, we started our change. We dumped every drop of alcohol out onto the ground. Signed up for 2 different 30 day challenges (planks and abs). Settled on a couple of walking routes. Logged out of Facebook. That last one was really a leap of faith for us both. It has been the most difficult part of all for me. I miss some people from fb, but I don't miss the drama and hate that shot at me every time I logged on.

With so many changes I am starting to feel like a new person. In those 17 days I have lost 7 pounds plus a million pounds that have been hitching a ride on my back for far too long. I know I will never touch another drop of alcohol and when the 30 day promise is over, I will decide what I am going to do about Facebook. As for the anger? I am only human. I am a work in progress (as I know we all are) but I am not going to be wearing so much on my sleeve. People will need to come after me hard to get a reaction. Some will. I'm getting stronger every day. I can handle it.

So, Constant Reader~ Happy Thanksgiving to you. I wish you love and peace and joy and calm. Hold those you love close and hold yourself closer. You mean a lot to me! God Bless~

Monday, August 26, 2013

Kale Cubes


So with the continual growth of my leafy greens and the upcoming event of having to switch from summer mode (lots of free time) to work mode (not much free time) I decided it is time to switch from consumption to preservation. That is where the kale cubes come into play.

Directions:

Pick and wash kale leaves.
Remove center stem.
Chop leaves well.
Wilt in a pot of boiling water.
Drain and cool.
Pack the leaves tightly into ice cube trays.

The leaves will still contain water and you want that to help freeze the leaves, but if you find them too dry pour water over the top of the trays to ensure a well frozen kale cube.

I am planning to repeat this process with Swiss chard, collards and spinach-and I am sure as the kale keeps growing I will continue to preserve it in this way.

I plan to throw cubes into soups and stews, casseroles and smoothies.

Saturday, August 24, 2013

Dehydrating Cucumbers~Who Knew?


Did you know? I thought dehydrating cucumbers would rank up there with dehydrating watermelon and water (a running joke in my house)! It can be done~oh joy! oh rapture! I have been drowning in pickle juice these past few weeks (NOT complaining) and then I stumbled onto these little nuggets. Who isn't looking for other options to preserve cucumbers this time of year?

Such a simple process and honestly didn't believe that this recipe would be anything short of a waste of time and ingredients. I am pleasantly surprised and just had to share with you, Constant Reader!

Process:


Peel and thinly slice cucumbers. I used my mandolin and the "thin slice" attachment.

In a large plastic bag put equal amounts of dried dill, garlic powder and onion powder.

Shake to coat all slices.

Place on dehy trays and dry until done. I set mine on 115 degrees for 7 hours, but remember what I said before~dry it until it is done. We all have different machines and situations AND you can never over dry!

My husband said the finished cucumbers taste like Italian dressing crisps. I love them and will do this again. Give it a try!

Enjoy and God Bless~

Friday, August 16, 2013

Cucumber Chips


Ahhh the endless possibilities of cucumbers! I have told you that my favorite pickle is the dill~ I have yet to set any cukes aside for that. Fear not, my harvest is still cranking along and as long as we don't get a frost in the next few weeks my next batch WILL be DILL!!!

I found a new recipe (new to me) that I have to share with you. Yummo! I did learn something about trying a new recipe... read it all the way through before you start. I have gotten rather lazy and decide that if I have all of the ingredients, I'm good to go. I was good to go with cucumber chips but the time frame through me for a loop. 2 days from start to finish! What? I was lucky this time because I don't start work until next week, but I would have found myself in quite a pickle if I didn't have today to finish up. Just a reminder for me!

                                                                Cucumber Chips

***The recipe said the yield was 3 pints, but I got 7~   3 pints using 6 pounds of cukes???***


Ingredients:

6 pounds cucumbers cut into 1/4 inch slices
1/2 cup canning salt
1 T. turmeric
1 quart plus 3 cups vinegar-divided
1 quart plus 1 cup water-divided
2 cups granulated sugar
2 sticks cinnamon
1 cube fresh ginger
1 T. mustard seed
1 tsp. whole cloves
2 cups brown sugar

Cucumber slices into a large bowl and sprinkle salt over the top. Mix thoroughly and set aside for 3 hours.

Drain, rinse, drain

Combine turmeric, 3 cups of vinegar and 1 quart water in a saucepan and bring to a boil. Pour over cucumbers. Set aside until cool. Drain.

Combine granulated sugar, 1 quart vinegar and 1 cup water in saucepan. Tie spices in cheesecloth or a spice bag and add to pan. Simmer 15 minutes and pour over cucumbers. Set aside for 24 hours.

Remove spice bag and pickles. Discard spice bag. Combine liquid and brown sugar in a  saucepan and bring to a boil.

Pack cucumbers in hot jars, leaving 1/4 inch headspace. Ladle hot liquid over cucumbers, leaving 1/4 inch headspace. Remove air bubbles. Adjust 2 piece caps and process in a hot water bath for 10 minutes.

Enjoy~

Thursday, August 15, 2013

Cucumber Jelly


Into making pickles up to my ears! (Not a complaint) I had 2 rather large cucumbers left over from my pickle chips I'm making today and I had run across a recipe for cucumber jelly the other day so ~ta-da!
This jelly is SO easy and tastes light and refreshing. My only regret is that I only reaped 4- 1/2 pints from this recipe. I will multiply it several times over next time around!

Ingredients:

2 large cucumbers
4 T. lemon juice
2 T. white vinegar
3 cups sugar
1 package pectin

Peel, seed and cube cucumbers.
Puree cucumber, lemon juice and vinegar until smooth. Strain to remove any pulp.
This should give you a yield of 2 cups of juice.


 Bring the mixture to a boil. Boil for 1 minute.
Add pectin and return to a boil.
Add sugar and boil for one more minute. Remove from heat.
Pour into hot jars and water bath for 10 minutes.

Enjoy~


Wednesday, August 14, 2013

Squash Pickles- My New Favorite Sweet!


I am a true lover of the pickle. Dill, salty and crunchy are the characteristics that really excite me, but with the gigantic harvest of summer squash this year, I have fallen in love all over again, with sweet. I combined 3 different recipes and the outcome is phenomenal! They stay crunchy and are so sweet. I even used onions from my garden so all I had to purchase were the spices. Give it a try!

                                   Summer Squash Pickles

2 pounds summer squash
1 1/2 cups onion
1/4 cup kosher salt

1 1/4 cups sugar
1 tsp. salt
1 tsp. dry mustard
1/2 tsp. turmeric
1/2 tsp. ginger
2 cups water
1 cup vinegar

Thinly slice summer squash and onions. Mix them together and put in a bowl.
Sprinkle the 1/4 cup kosher salt over the top.
Cover with 2 hands full of ice and cover all with water. Let sit for 30 minutes.

Combine remaining ingredients in a large saucepan and bring to a boil. Add squash and onions and boil  for 10 minutes-stirring occasionally. 

Pack hot mixture into hot jars with 1/4 inch headspace. Remove air bubbles and put on caps. Process for 10 minutes in a water bath. 

Enjoy~

Tuesday, July 16, 2013

Reflection- It's My Birthday


We wait all year for that special day that marks our arrival into life. Onto the planet. The day that started our life and changed the lives of those who had been waiting for our arrival. I love the last page of On The Day You Were Born by Debra Frasier.

                                  "Welcome to the spinning world,"the people sang,
                                        as they washed your new, tiny hands.

                                   "Welcome to the green Earth," the people sang,
                                        as they wrapped your wet, slippery body.

                                              And as they held you close
                                    they whispered into your open, curving ear,
                                         "We are so glad you've come!"

I was one of the fortunate ones. Did you ever consider what a miracle you are? Are you ever thankful that your parents chose life? I know I am. When I get overly philosophical I find myself being overwhelmed at the intricacies of life. Amazed that I am still alive. Am I the only one who is so thankful for their sheer existence in the fragile circle of life?

Life is so precious and most of the time we spend day in and day out wrapped up in the insanity of worldly happenings and the wrongs we have been dealt. I know I do. My best days are the ones where I am unplugged from the overload. I don't think we were ever meant to be so stressed out on a consistent basis.

I mark my years and set my goals at 3 different "New Year" times. The first is January 1st, the second is the first day of school and the third is my birthday. This year, I want to be more unplugged from the noise and more plugged in to what is important. I am thankful to have my Lord, my health, a loving family, a grand baby on the way, a beautiful place to live, amazing friends and a job that I love. Who could want anything else? What else is there?

Some really not-so-nice things are coming my way soon. I will deal with them when they are in my face. I'm not going to worry until then. Worry and sadness are a part of life but are not going to be anything more than an itty-bitty bit from this day forward.

So, my birthday wish for you, Constant Reader? To look at yourself in the mirror and love EVERYTHING you see. Take care of those you love. Take time for yourself and do what you like to do. Appreciate all that you have been given.

Live Out LOUD!


Monday, July 15, 2013

Swiss Chard


So, my prepping plans got put on the back burner for today. I was supposed to make and can some kale soup for you today, but the temperature will hover at around 90 degrees and I'm not feeling the urge to torture myself by standing beside the stove for the next 6 hours.

I decided instead to make today a research day and keep my feet uncovered and in front of the fan as I scour my resources for the next great prep! Before I go, I want to share with you the side dish that I made for my family last night for dinner. Quick, easy, yummy. Who doesn't want that?


Swiss chard is growing abundantly in Sarah's Eden and it was looking especially tasty last night. Who can resist the beautiful rainbow colored stems and the lush green leaves. This is what I did...

1. Wash thoroughly to rid Swiss chard of any bugs and dirt.
2. Cut out spine from the center of the leaf. Save this to add to soups or stir fry.
(The spine will act like celery in any of your favorite recipes. Remember-waste not~want not.)
3. In a skillet saute 1 large onion, 3 cloves of garlic and 1 T. mustard seed in some olive oil.
4. Fill the skillet full of the Swiss chard. It will behave just like spinach and shrink down rather quickly. I put a cover on just for a few minutes to help the process along.
5. Once the Swiss chard is wilted you will be able to work the onion, garlic and mustard seed into it by carefully stirring together.
6. Finish with salt and pepper, butter, vinegar, or be like me and go "all natural".

Enjoy!

Friday, July 12, 2013

News From White-y's Hood

So, in White-y's hood today there is great tension mounting as the entire country awaits the outcome of the Zimmerman trial. Why? Because the "black pussies" want to come out to White-y's hood and burn, pillage and rape everything moving. Evidently they have finally figured out that burning down their own neighborhoods is not the smartest thing to do. Wow, I would have thought Al Sharpton or Louis Farrakhan would have figured out how to program that into their malleable, moronic brains before now. Well, come on over to the hood- I'm quite at my leisure here awaiting your arrival. BUT...you best come overly prepared if you want to leave here alive. The threats drizzling out of your hate filled souls aren't going to stand up to the surprises White-y has in store for you!

This is just another game being played to cause tension between the citizens of this country. The divide and conquer method has worked quite well and to quote another scumbag, "can't we all just get along..." how is that working out? If you have not looked into the Executive orders that just 1 person is allowed to install that will basically immobilize you and allow the government to take whatever they wish for the good of the country, I would ask you to stop reading my drivel and go do the research yourself. 

When the riots start and martial law is issued, you best be ready with everything you need for an extended stay at home or a quick escape if you are unfortunate enough to live in White-y's hood. I would recommend if you do live there-leave now! Seriously. Pack up your car with your 72 hour bug out bag, your kids and pets and head for the mountains. 

As for me, I'm locked and loaded and sharpened and...well, let's just say the 4th of July will be pale in comparison. Keep safe my friends, keep safe.

Saturday, July 6, 2013

3 Sister's Garden-Update

Wow! I was looking back at my June 23rd post and pictures of my 3 sisters garden when I was really worried about how it would turn out and, well, I guess I shouldn't have been worried at all. It is amazing! I have wanted to try this for a long time and finally made it happen this year. I picked the first summer squash and included them with our 4th of July kabobs. I made a little video of my 3 Sister's Garden for those who are more visual.

Before you watch it let's talk a little about the "why" of this garden. I love the history and the idea of this Native American garden called the 3 Sisters (corn, beans and squash) who are said to grow and thrive together. As an only child, I have no idea about the whole sibling phenomenon,  but I would like to think that if I had sisters we would grow and thrive together. Who knows?

I am more interested in the mechanics of it. I cleared my mint patch down and out, stirred in compost and off we go! The squash was started in the house, the corn and beans were directly sown into the ground. I was concerned that the squash would get too large and choke out everything else. I think that did partially happen, but I still have all 3 things growing. I will see how the harvest is as to whether or not I will change how I do it next year.

The beans are supposed to climb the corn which helps not having to trellis them and the bean plants anchor the corn plants and add stability. The beans put nitrogen into the ground which helps the corn grow. The squash have shallow root systems and the leaves shade out young weeds and help hold the moisture in the soil. The spikes on the squash plants also keep pests away from the ever growing corn and beans.

In the video you will notice the fence surrounding the garden is ready to come down in order to allow the plants to spread out and to make harvesting easier for me!

If you see something I could, change, add or improve on please let me know!
Enjoy~


Friday, July 5, 2013

DEHY- Collard Greens


 I am growing an enormous amount of greens in my garden this year. I am completely inspired by John Kohler and his "growing your greens" and "okraw.com" channels on YouTube. He is out to start a revolution (he actually already has) and he has inspired me along the way, hence the large amount of greens producing like mad in my garden!


I also have a mentor over at  "dehydrate2store".  I went there the a few days ago looking for the best way to dehydrate greens. To my surprise- and happiness- she had made a new video on how to make collard green roll ups. They are the same as cabbage but instead using a larger, stronger leaf-the collard. Well, Constant Reader, collards I've got!


I wasn't told the HOW of dehydrating the leaves and when I went searching I found two definite discrepancies. To steam and not to steam. Wow! there is a lot of information out there to hang your hat on, but I couldn't make a decision as to which I would do...therefore, I did both and made my own decision!

Wash your leaves well. Remove longer stems.


On a few trays I simply placed the leaves for dehydrating. 
This was the result.
For the rest of the trays I steamed the leaves for 2 minutes and spread them out. 
This was the result.

I can say that I am not very excited about either of the outcomes. The ability to store these leaves  whole is going to be difficult. If you can picture the texture, it is like brittle tissue paper. I was going to rehydrate them and make the collard green roll ups today, but since it will be around 90 degrees, I think I am going to hold off on that for now. I will attempt to get these into proper storage for now and will show you (very soon) how they rehydrate and how this recipe works out for me!

If you have any tips, tricks or ideas about a different way to put greens into long term storage, I would LOVE to know!


Thursday, July 4, 2013

Grandpa Was A Prepper

First of all...Happy 4th of July, Constant Reader! I hope yours is safe, fun and a real memory maker!

I know that I live in the best country in the world. Hands down. We are hanging by a string, though and our worst enemy is-us. Yes, us. Our country has become incredibly splintered and although we all band together and beat our collective patriotic chests when attacked from the outside, when it comes to us as a society and living amongst one another, we are doomed. That leads me to~being prepared. Are you?

I grew up in a tiny town on the coast of Maine where you never left. You didn't have to. Absolutely everything you needed was supported within our boundaries. From cars to dishwashers to underwear. It was all within walking distance. I continue to live in that same small town but there isn't one place within 30 miles that I can buy a pair of underwear. Oh sure, I can visit a lovely botanical garden or swim in a pool made of gold or play golf with the wealthy- but is that what will be needed when all hell breaks loose?

We have a "comprehensive plan" going on in our town right now. Nowhere in it can I find a shred of self sufficiency or personal responsibility. All I see is "We are from the government and we are here to help." I'm not interested. Every time they come to help, someone gets the shaft. I always drop back and try to look through my grandfather's eyes and wait for him to speak to me. He has been gone for a few years and no I don't really see or hear him, but I believe that the farm is a living breathing thing and he is here-all around. 

My grandpa was a prepper long before that became some sort of wacko catch phrase. This town was a prepping town. When he had a surplus of meat, chickens, eggs, vegetables on the farm, he would deliver them to friends and to the local grocery store. My grandmother knit hundreds of little mittens, sweaters and hats to keep the children of this community warm. They were never a burden on society. They worked side by side in every venture they undertook. They were ready for any catastrophe that could knock them down. My grandfather made money with his brains and his back and when he was shot in the early 60's and was out of commission for over a year, they had a plan for that. They were already ready.

 I do lay awake at night and fear for my country but mostly I toss and turn knowing that I am responsible for the safety, nourishment and care of my family. It is a huge task and I often wish I could just forget it and be like most of society but I don't want to be like most of society. My Grandpa was a prepper and so shall I be! What say you?

Prep on and Happy 4th!

Tuesday, July 2, 2013

Rhubarb Wine- First Steps


I really like it when solutions to questions I have solve themselves right in front of my eyes! One question, "What am I going to do with all of this rhubarb?" The second question, "What kind of wine should I attempt to make first?" 

BINGO! Rhubarb Wine! 

I really like Chris Johnson's step by step YouTube video on this process and so I have chosen to follow him this time around. I love Mistyshooter223 wine videos as well. She is up next! Here is a link to Chris Johnson's wine making. (No, Maine, not our Senator~)


First, snap off your rhubarb.

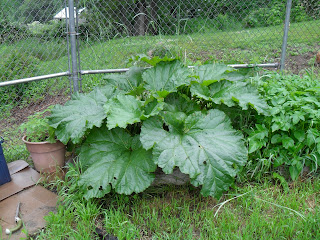
My foot is a woman's size 13 and it looks really petite next to some of these leaves! Really neat ideas on Pinterest using big leaves~maybe next year!

Take your fruit, wash, take off bad spots and chop.

Finished chopping.

10 1/2 lbs is what I ended up with.

The video tells me that I need 10 lbs of rhubarb to make a 5 gallon batch of rhubarb wine. I guess I just made it! 
Into the freezer it goes until the rest of the ingredients are ripe and ready to pick. I need to order some champagne yeast and a couple of other supplies, but for right now...first steps are complete. 
If you have experience, tips or "be carefuls" to add to this process, please give me a heads up. I'm in uncharted territory and could use your wisdom.

Thank you, Constant Reader, and God Bless! 


Monday, July 1, 2013

Waste Not-Want Not


That's what my Grammie always used to say. I say- "You Betcha, Grammie!!!" She was the smartest woman I have ever (and probably will ever) known. Well, you know that in our last blog we canned chicken. My first time with that process, but not my first time with the question- what to do with the left over carcass?  In this case bones and skin.  Don't throw it out! Cook it off and make your own broth. This allows you the opportunity to add anything you want and make it your very own. More salt-less salt- more spice-less spice. It is entirely up to you!

Start by placing all remnants of your chicken into a pot and covering it with water. I bring it to a boil and then simmer for about 3 hours.

Drain and allow to cool.


Then carefully go through the pieces of chicken that you have left. Cast bones and skin to the side and take as much meat as you can get. The bones are always my biggest concern. They are sneaky little devils and they can hide in your chicken meat that you think you have cleaned fresh off the bone. They hide and they can be super annoying. When I have gone through the entire batch of leftovers and have sorted it all out, I take my hand and squeeze, smoosh, and basically destroy the chicken pieces. Remember, this process is not to harvest the meat-it is all about the broth.

But... the meat is nothing to sneeze at! Look at this bowl of chicken meat that was basically salvaged from the pile of skin and bones. I like to think of it as the raggy body of a lobster. So much time spent picking, but where it is the sweet meat, every tasteful is worth it! 

 At this stage, you could get out some mayo and bread and have sandwiches, or...you could add it back to the broth to make a nice jump off point for a chicken veggie stew! 

Which is just what I did with this batch! Please use all that you have to the farthest you can take it. "Waste not-want not" got my grandparents through the Depression.  Hopefully the same slogan will get  me through mine.


Sunday, June 30, 2013

Canning Chicken-My Way

It has been such an amazing week on the farm with SO much research and prepping plans that I'm tuckered out!

I have been waiting for 4th of July to come along so I can stock up on chicken. First thing this morning, I ventured down the hill to my only supermarket in town and purchased a lot of boneless/skinless breasts for cheap, cheap, cheap!!! I brought them home, packaged them, and into the freezer. Although, all the while, I had a little voice in my head telling me to go get more and pressure can it. Some people get obsessed with sports- I get obsessed about food storage. I'm sure there is no cure!!!

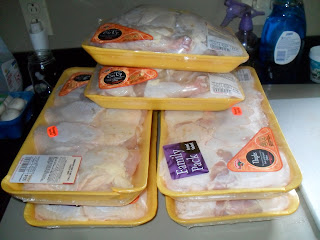
I am not one to be nervous or question my ability, but I have never been comfortable at the thought of processing chicken. Mostly due to safety and...well...texture. BUT...I convinced myself to not be "such a chicken" and I went back to the store, purchased 20 pounds of jumbo thighs and 2 entire split chickens for $30.00 and brought them home. No turning back then!

So, I had to make the decision as to which method I was going to try for the first time. I decided skin off, bone out, raw pack with no liquid added and no additional salt.  There are lots of different schools of thought out there  about the "best" way... (as there always seems to be regarding prepping) but they are all safe and effective ways to get the desired results. So let's take a look.

Before you attempt any preservation of foods:Know your ingredients and your equipment and be prepared to spend hours in the kitchen. You can not walk away from a pressure cooker. I am not responsible for anything!

1st-  I took all skin and bones off and out of my chicken pieces. This took a long time (3 hours) but the meat was inexpensive, so it was worth it. Remember you can leave the bone in and the skin on if you want to.
 

Next- I packed the meat tightly into pint jars (of course you can use quarts). Make sure there are no air pockets and leave a 1 inch head space. Wipe the tops of your jars thoroughly. They will be greasy and you will not get a seal if you skip this step. 


Process jars in a pressure cooker: 10 pounds of pressure

pints-bone in- 1 hour and 5 minutes
pints- bone out-1 hour and 15 minutes
quarts-bone in-1 hour and 15 minutes
quarts-bone out-1 hour  and 30 minutes


Use your chicken for soups, stews, enchiladas, casseroles and absolutely everything you use cooked chicken in. 

I did it! You can, too!!!

Wednesday, June 26, 2013

Unplugged... (I dare you!)

Could you do it? Could you unplug from this constant information overload for an hour? A day? A week? How long could you go without that psychological contact and safety that being plugged in gives you?

I was cruising the internet trying to decide my next step in this huge process of becoming self-reliant. I was confronted with a scenario of where we are in full disaster mode (you decide the scene) and the public is nervous, confused, cracking. Then add losing our modes of communication (tv, cell phones, computer). Civilized society is going to break down. Quickly. In a very bad way. I really hadn't thought that through before.

Getting a ham radio license has been on my priority list to purchase and get used to BEFORE anything may happen, but I didn't realize that the ham radio outposts are also going to go down in a relatively short time. There are solar powered stations, but not enough.

So, what is left? How will this all play out? I have no idea, but there are a couple of things to think about.

***How addicted are you to your electronic devices? Envision a world where they are turned into paperweights and find out where your stress level is. 

***What is your plan to communicate with the people you love? Seeing that they are o.k. and to assure them that you are o.k. during a disaster is going to relieve that psychological tension. 

Before I began down this road to self-sufficiency, the first thing that had to be decided on (before one can of beans was purchased) was, "Am I a survivor?" The answer was a resounding, "YES!"

Ask yourself that question. Are YOU a survivor? Are you willing to be all alone? To refuse government help (that won't be there anyway)? To be in a position of power and not pity? To protect what is yours at all cost? Well, if you answered, No" to any of the above questions, you are unfortunately going to be part of the problem rather than part of the solution.

Let's spend some days, weeks, months getting our brain in the game. I want that for you. I really do!


Sunday, June 23, 2013

Catching Up and A Few Questions For You!

School is out and I am starting to feel like my ship is righting itself~finally. I'm spending the majority of my time outside and I am VERY thankful I am able to do that.

Below are some pictures taken today on Hidden Acres Farm. As I was snapping pictures I came up with a few questions for you, Faithful Reader. My first is, "Do you plant heirloom seeds? If so, do they grow way slower than regular ones?" I have thrown myself (almost) completely into heirlooms and those little darlings are growing at a much slower rate.

Next question, "Have you ever straw bale gardened?" Again, I have planted heirloom eggplant in the straw bales, and I don't know if it is technique or seed???

Can you help a girl out?

So here goes the tour...I hope you enjoy it~

3 Sister's Garden. Squash, corn, beans


Exploded tire full of lettuce.
Grandmother's old wash bin overflowing with lettuce.

Rhubarb and potatoes
Tomatoes and herbs
Tomatoes


Cukes, beets, beans

Broccoli, cauliflower, assorted greens

Red Russian garlic

Banana pepper-hot stuff!

Straw bales with eggplant. Other boxes have tomatoes and eggplant

Peas. Planted at the same time. Heirloom so much smaller.


Radishes just poked through. Planted 4 days ago. Container is an upside down vent top. Cool, huh?


Yeah! Growing my own calendula this year for my soap!